Requirements: Have access to Frigost 3 by defeating the Celestial Bearbarian.
Monsters
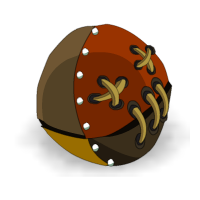
Leatherball
Cuirboule
Lvl 200 to 212
Spells
| Name | Description | Range |
|---|---|---|
| Oddball Maboule | Pulls the target in, then pushes it back 10 cells. If the Leatherball hasn't used any MP, the spell deals around 1,000 Earth damage; otherwise, only the pushback damage applies. | 0 à 11 |
| Swelling Gonflage | Applies a Water poison that deals around 200 damage per MP used by the target. | 0 à 6 |
| Puff Bouffée | When a target fails to escape from melee, the Leatherball gains around 600 damage — 800 on a critical hit — and recovers around 600 HP. | 1 |

Dumple
Grodruche
Lvl 200 to 212
Spells
| Name | Description | Range |
|---|---|---|
| Vomito | Deals around 600 Earth damage as lifesteal in melee and applies the Gravity state for 1 turn. | 1 |
| Nerveherder Nerf de boeuf | Pulls the target into melee and deals around 600 Water damage to it. | 0 à 6 |
| Rapid Digestion Digérer pour mieux régner | Makes the Dumple unmovable for 2 turns and applies Transit. When it is hit, characters and monsters within 4 range gain 2 MP and 50 Lock; characters and monsters at 5 range take around 300 Air damage. | — · cercles de 4 et 5 PO |
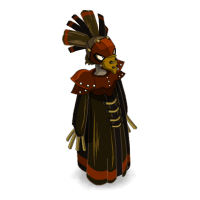
Harrogant
Lvl 200 to 212
Spells
| Name | Description | Range |
|---|---|---|
| Disdain Dédain | Deals around 500 Neutral damage on 2 cells in a line, pushes back 4 cells and does not require line of sight. | — · ligne de 2 cases |
| Leathercut Coupe-cuir | Deals around 500 Air damage as lifesteal, at range and in a line. Removes 4 range for 2 turns — 5 on a critical hit. | — · ligne |
| Pride Fierté | Applies Insolence. When it is hit, characters within 6 range take around 500 Earth damage and monsters in the same area are healed for around 800 HP. | — · cercle de 6 PO |
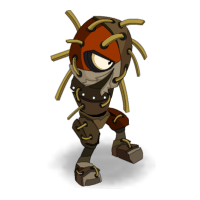
Putchup
Peunch
Lvl 200 to 212
Spells
| Name | Description | Range |
|---|---|---|
| Huppercut Ioupercute | Can only be used in melee, on two characters per turn. Its damage scales from around 0 at full health to nearly 2,000 near death, and the spell removes 8 dodgeable MP. | 1 |
| Sir Cular Cire culaire | Hits every character located exactly 2 range away with Fire lifesteal for around 400 damage, and steals 100 Intelligence for 3 turns — 150 on a critical hit. | 2 · anneau à 2 PO |
| Tyzone Tayezone | Applies the Weakened state and removes 100 Dodge — 150 on a critical hit — from characters within a 3-cell area around the Putchup. | — · cercle de 3 PO |
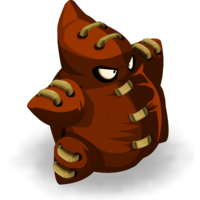
Asteraw
Empaillé
Lvl 200 to 212
Spells
| Name | Description | Range |
|---|---|---|
| Taxidermy Taxidermie | Deals around 450 Neutral damage in a line, pulls in and turns the target around, applies the Gravity state and removes 6 dodgeable MP — 12 on a critical hit. | 0 à 8 · ligne |
| Mulching Paillage | Leaps up to 3 range away and deals around 450 Air damage plus 40% erosion to characters adjacent to the landing cell. | 0 à 3 · autour de la case d’arrivée |
| Gunny Sack Gros sac | Grants 1,000 damage to the Asteraw and applies the Gravity state to it on the following turn. | — |
Rooms
A very simple room: kill the Putchup first, then stay out of the lines while killing the Asteraw, then the Leatherballs.
Room 1
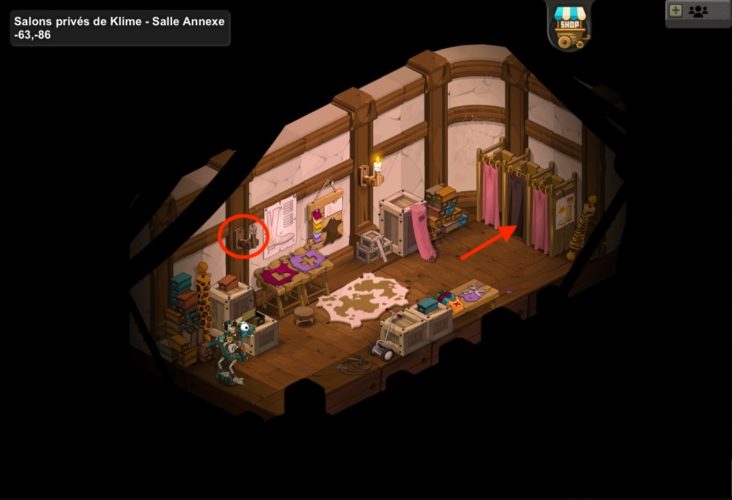
You are now in a side room: activate the chandelier to reveal the secret passage in the fitting room and get through.
Room 2
Room 3
Boss
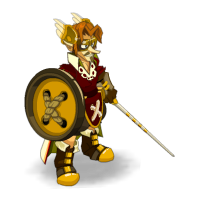
Klime ★
Lvl 220
Spells
| Name | Description | Range |
|---|---|---|
| Musical Glyph Glyphe musical | Grants 100 Lock and 300 damage to Klime or one of his allies. | — |
| Moustache Trimmer Cuir moustache | Applies a stackable Fire poison for 3 turns that deals around 150 damage. The spell is cast in a line, without line of sight, and pulls the target all the way to Klime. | — · ligne |
| Moustachio Moustacheron | In melee, deals two lines of around 150 Fire and Air damage, then a Neutral line whose damage increases as Klime loses HP. | 1 |
Dungeon mechanics
The glyphs
Permanent effect: Carcassetagne
At the start of its turn, each monster places a glyph on the cell it is standing on. This mechanic is inactive during the first two turns, but becomes mandatory from turn 3 onwards.
At the start of the fight, all characters receive the Peau Lisse effect for 3 turns. This effect protects them from the instant death caused by Carcassetagne.
From turn 3 onwards, ending your turn on a glyph triggers Galuchat and renews Peau Lisse. A character who plays after a monster must therefore have Peau Lisse when that same monster starts its next turn. Otherwise, they are killed instantly.
In practice, if a character ends their turn 3 off a glyph after a monster other than Klime has played, they will be killed on turn 4 when that monster plays again, provided it is still alive. Klime is only taken into account in this system from turn 5 onwards.
How the glyphs work
- A glyph remains in place for 2 turns.
- Each monster can therefore provide up to two available glyphs.
- If a monster starts two consecutive turns on the same cell, you will only have one glyph at that spot.
- The glyphs tied to a monster disappear when it dies.
- A monster that ends its turn on a glyph receives 300 damage for 1 turn.
- You do not need to start your turn on a glyph: you can free one up, take an ally's place, or share the spots between several characters.
Removing Klime's invulnerability
To make Klime vulnerable, you must push an ally against him. Pushing Klime against an ally does not work. The principle is the same as the one used against the Obsidemon.
Preparing the team
Whenever possible, arrange your initiative order by alternating:
- a positioning character, able to free up a glyph or take an ally's place, such as a Pandawa, an Eniripsa or a Sram;
- a character less self-sufficient in positioning, such as a Sadida, a Feca or a Xelor.
The positioning character can then take the previous character's spot while freeing up a glyph for the next one.
Recommended kill order
- Dumple: its Unmovable state can quickly block the team's positioning.
- Asteraw: its heavy MP removal can prevent a character from reaching a glyph.
- Leatherball: its single MP greatly limits its movement, so it can be saved for last.
Defeating Klime
Klime becomes particularly dangerous as soon as his HP starts to drop. Two approaches are possible:
- Kill him in one turn: with enough burst damage, notably thanks to a Iop or a Rogue, make him vulnerable then take him down before he can benefit from his power spike.
- Play the erosion game: gradually reduce his maximum HP while healing him every turn. This limits the damage he deals while his vitality threshold drops.
Note: Klime seems to prefer going around summons to reach characters. A summon with a lot of Lock, such as a Pandawasta or a Sram's Double, can therefore be placed in melee with him to make him lose AP while he moves.
Achievements
Nomad
A fairly tricky achievement, since you have no control over where the glyphs are placed. Make sure every one of your characters has 6 MP, and that you bring a Pandawa and ideally an Eniripsa.
Pusillanime
A fairly simple achievement: just watch out for the monsters, especially once you start ending your turns on the glyphs. Positioning characters are once again recommended. Completed with a team made up of a Sadida, a Pandawa, an Eniripsa and a Iop.
Duo
As you will have gathered, the Pandawa is your friend in this dungeon. The strategy consists of taking a tank Pandawa (high Recommended setup
This strategy relies on two complementary characters:
- a tank Pandawa with plenty of Vitality, good resistances and at least 100 Lock;
- a Fire-based character, able to keep the Pandawa alive thanks to the Arc Hétype.
From turn 3 onwards, the Pandawa must carry the healer to protect them. It can also use this maneuver to free up a glyph when its partner cannot do so themselves.
Using Stabilization is strongly recommended to prevent the healer from falling off the Pandawa.
Start by eliminating the other monsters. Once Klime is isolated, the Pandawa must carry the healer and stand one cell diagonally from the boss, i.e. at 2 range.
The fight can then follow a cycle alternating between two types of turns.
- Klime comes into melee with the Pandawa, hits him and stays in contact.
- The healer dismounts behind the Pandawa.
- They cast Release to push the Pandawa against Klime and make the boss vulnerable.
- The healer then moves to the cell where Klime started his turn, one cell diagonally from the Pandawa.
- The Pandawa pushes Klime back one cell, attacks him, then picks the healer back up.
- The Pandawa ends its turn on the cell previously occupied by the healer.
- Klime comes back into melee with the Pandawa, hits him and stays in contact.
- The healer dismounts to heal the Pandawa and use their support spells: shield, poison or mastery.
- They then move to the cell where Klime started his turn, one cell diagonally from the Pandawa.
- The Pandawa pushes Klime back one cell.
- It casts Souillure and Vulnerability, then picks the healer back up.
- The Pandawa ends its turn on the cell previously occupied by the healer.
If the healer has another way besides Release to push the Pandawa against Klime, you can chain only A turns and make the boss vulnerable every cycle.
Towards the end of the fight, the healer can also devote all their turns to healing if that becomes necessary to keep the Pandawa alive.
An issue with Klime's AI prevents this technique from working properly with certain classes. When a Sadida is carried — and potentially some other classes — Klime does not always stay in melee with the Pandawa.
The strategy notably works with an Eniripsa, a Sram or a Iop, and probably with several other classes as well.
End of the dungeon
Talk to Klime to leave the dungeon.