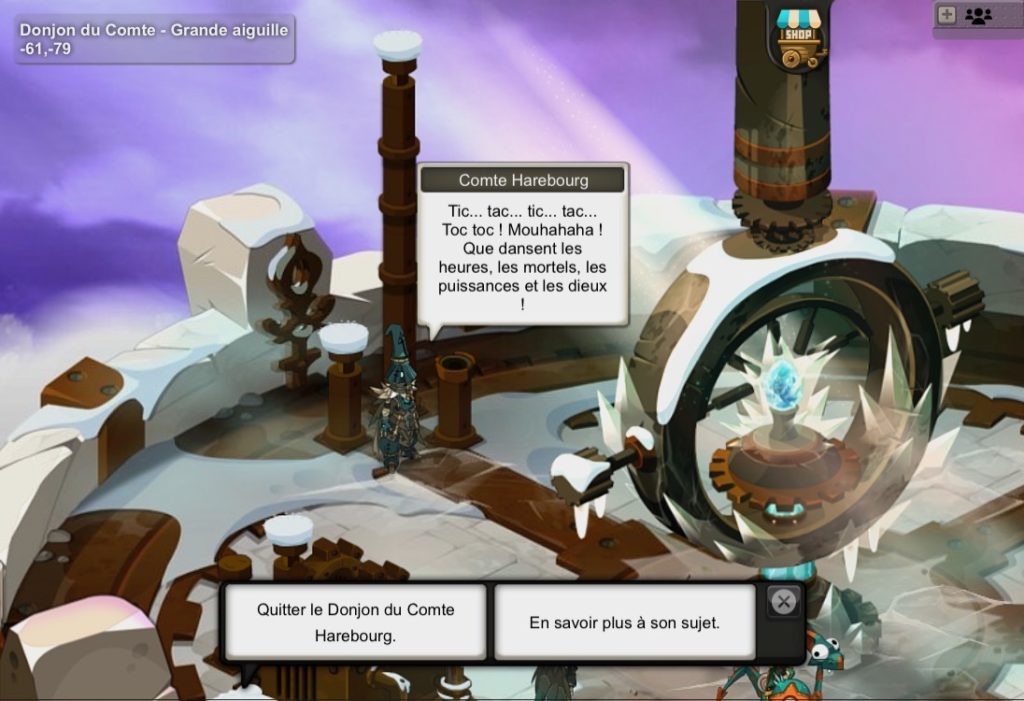
Prerequisites: Have access to the Clepsydra Tower by having defeated Nileza, Sylargh, Klime and Missiz Frizz.
Monsters

Cycloid
Cycloïde
Lvl 200 to 212
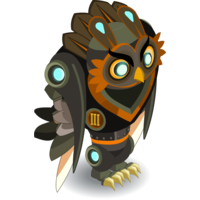
Bubotron
Granduk
Lvl 200 to 212
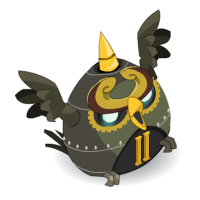
Nocturnowl
Nocturlabe
Lvl 200 to 212
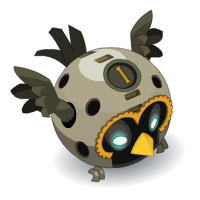
Sinistrofu
Lvl 200 to 212

Treadfast
Strigide
Lvl 200 to 212
Rooms
Room 1
Room 2
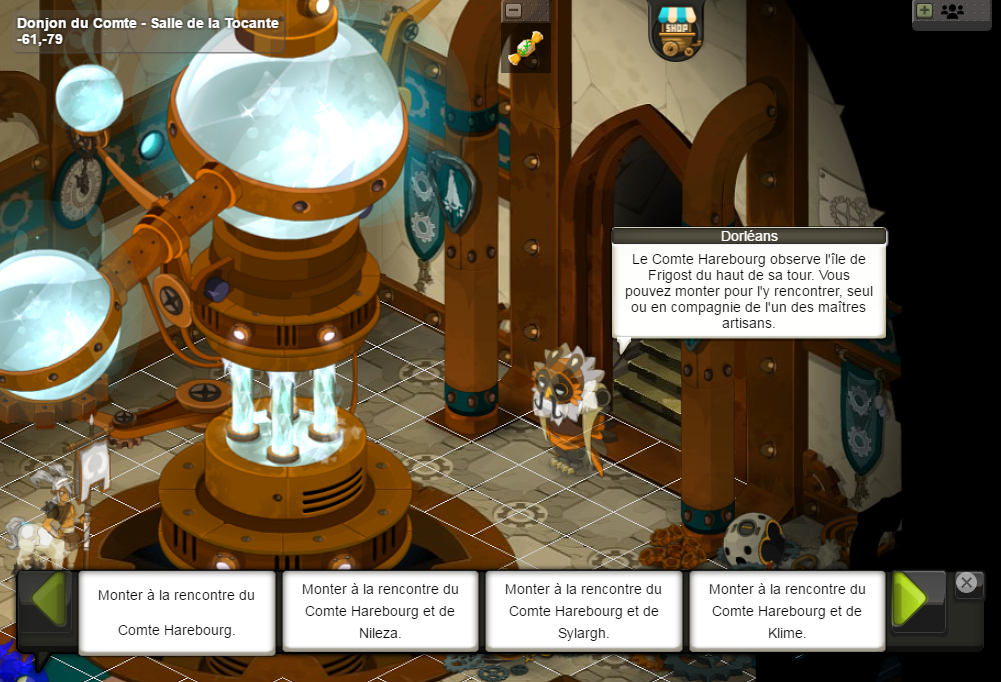
You have now reached the Ticker Room, a transition room; talk to Dorlean to continue.
He will offer you several choices:
- Face Count Harebourg
- Face Count Harebourg accompanied by Nileza.
- Face Count Harebourg accompanied by Sylargh.
- Face Count Harebourg accompanied by Klime.
- Face Count Harebourg accompanied by Missiz Frizz.
Room 3
Harebourg and Missiz Frizz
 Count Harebourg
Missiz Frizz
- Bubotron
- Cycloid
Harebourg and Sylargh
Harebourg and Klime
- Count Harebourg
- Bubotron
Klime
- Cycloid
Harebourg and Nileza
- Count Harebourg
Nileza
- Bubotron
- Cycloid
Boss
!!! Warning: this fight is highly complex, with a large number of spells and mechanics to take into account. Take the time to read the explanations below carefully to familiarize yourself with them !!!
Count Harebourg ★
Comte Harebourg
Lvl 220
Spells
| Name | Description | Range |
|---|---|---|
| Bad Timing Contretemps | an Earth spell dealing around 800 damage, with a second Water damage line that depends on the Count's remaining HP (0 when he hasn't lost any HP, up to 1000 when he is close to dying). This spell is cast in a line only, with no line of sight and unlimited range. In addition, when the Count casts this spell while vulnerable, the target is teleported back to the cell where it started its previous turn (rollback). | — |
| Jacquemart | a Water spell dealing around 600 damage up to 4 range without line of sight. It applies the Gravity state to the target for 1 turn. | — |
| Multicount Multicomte | a spell he casts only when vulnerable, which comes in two parts. The first part is similar to the Rogue's Slyness, except that he can cast it in a line OR diagonally at 4 range. 4 doubles of the Count are thus created. The second part deals Fire damage (up to 800) in a ring of 3 to 5 range from the cell where the real Count stands. By analyzing which characters or allies were hit by the spell, you can work out where the real Count is among the copies. As this spell is more complex, a note is available below. | — |
Note that the Gousset effect is triggered once per damage line, so multi-line spells or weapons will trigger several teleportations.
Multicount being fairly complex, here is an explanatory diagram:
- In red, Count Harebourg's initial position
- In green, the characters and allies.
- In blue, the doubles created by the spell. There are only 3 because the 4th cell is a hole, so the last double was not created.
- Finally, in orange, the damage area of the Multicount spell, cast from the blue cell containing a C (the Count's real position), which dealt damage to the allies whose cells contain a T.
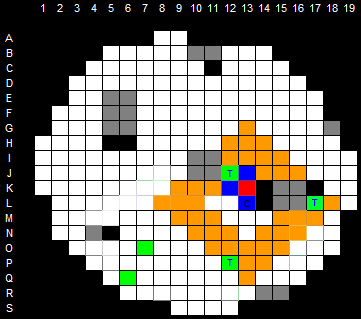
So, by analyzing the 3 allies hit by the spell, you can deduce that only one cell can match the Count's real position.
Dungeon mechanics
At the start of the fight, the Count casts a spell that applies a confusion to the characters. An effect is applied to them at the start of each turn, causing spells not to target the chosen cells.
Many people think these confusions are random, and the fact that they are numerous and complex makes this dungeon seem harder than it really is.
But that's not the case! After dozens of tests and a bit of thinking, Phissure and Karnakoss have demystified Count Harebourg's confusions for Papycha.
The confusions at the start of each turn actually depend solely on your remaining HP percentage. Here is an explanatory table; the first and last columns are the most important if you don't know the confusions at all:
Important note about the table: you can get either of the two confusions when your remaining HP percentage is exactly on a threshold value. For example, you may get the 1/2 pi counterclockwise confusion if your HP percentage is 74%.
Note about line of sight and critical failures: to properly target a cell, both cells (the cell you actually want to hit and the cell you aim at) must be reachable by the spell you are using. You can indeed suffer critical failures if you aim outside the play area or at an unreachable cell. Important: weapon critical failures will end your turn.
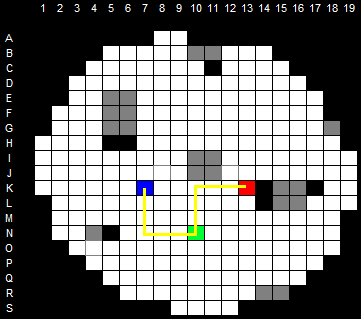
1pi/2 clockwise confusion:
Names of the corresponding confusions:
- Clockwise Confusion 90°
- Clockwise Confusion 1pi/2
- Clockwise Confusion 2pi/4
- Counterclockwise Confusion 270°
- Counterclockwise Confusion 6pi/4
- Counterclockwise Confusion 3pi/2
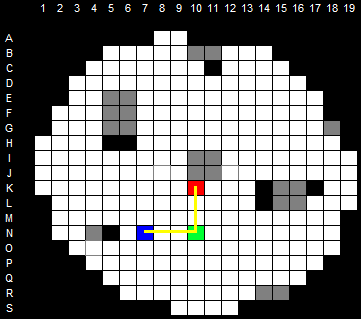
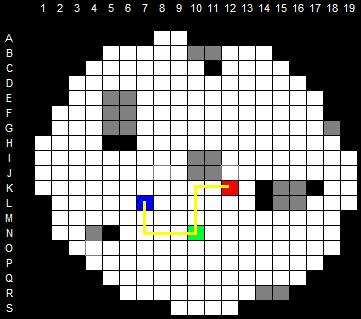
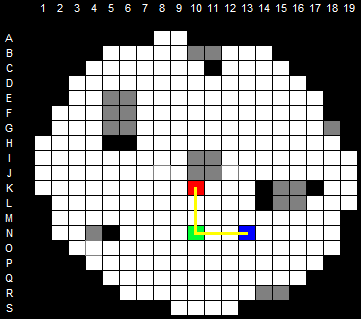
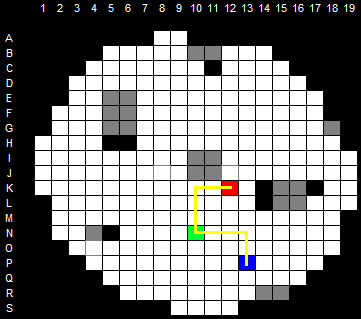
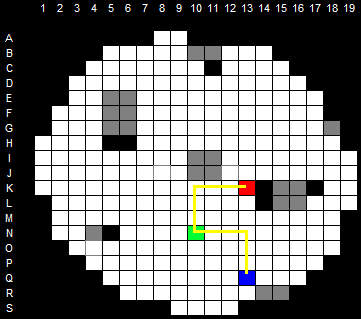
As shown in the table, the cell to aim at is located 1/4 turn counterclockwise from the target.
Here are 3 examples, with your character's cell in green, your target in red and the cell to aim at in blue, which is therefore located 1/4 turn counterclockwise from the target's actual cell.
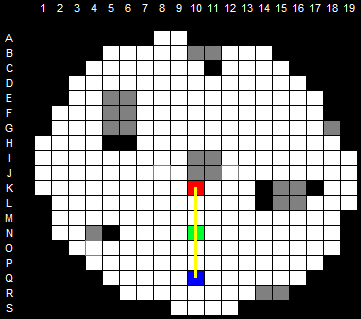
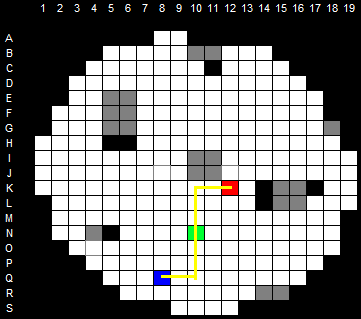
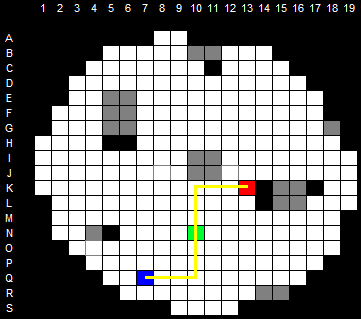
Pi confusion:
Names of the corresponding confusions:
- Clockwise Confusion 180°
- Counterclockwise Confusion 180°
- Clockwise Confusion 2pi/2
- Clockwise Confusion 4pi/4
- Counterclockwise Confusion 2pi/2
- Counterclockwise Confusion 4pi/4
As shown in the table, the cell to aim at is located half a turn from the target.
Here are 3 examples, with your character's cell in green, your target in red and the cell to aim at in blue, which is therefore located 1/2 turn from the target's actual cell.
1pi/2 counterclockwise confusion:
Names of the corresponding confusions:
- Counterclockwise Confusion 90°
- Counterclockwise Confusion 1pi/2
- Counterclockwise Confusion 2pi/4
- Clockwise Confusion 270°
- Clockwise Confusion 6pi/4
- Clockwise Confusion 3pi/2
As shown in the table, the cell to aim at is located 1/4 turn clockwise from the target.
Here are 3 examples, with your character's cell in green, your target in red and the cell to aim at in blue, which is therefore located 1/4 turn clockwise from the target's actual cell.
Additional confusions:
Your confusion may be modified during your turn if you attack a monster or the Count in melee, due to the passive spell "Pandultimatum". It works as follows:
- Attacking a monster or Count Harebourg in melee: an additional 1pi/2 clockwise confusion (i.e. 1/4 turn counterclockwise) is added to your existing confusion per damage line. This effect is limited to 10 triggers per turn per monster; after 10 confusion additions, your confusion will no longer change. For example, if the character playing first triggers 10 confusion changes on a monster, the next character to hit that monster during the same game turn will only trigger 2 confusion changes, and the following characters will trigger none.
Note 1: Be very careful with this confusion change when you hit Count Harebourg. Indeed, the additional confusion and the change of position of the Count or of yourself (see the Vulnerability section) can quickly become a problem if you're not paying attention.
Note 2: The monster's death stops the triggering of the "Pandultimatum" spell. So, for example, if you attack a monster with a spell or weapon that has 3 damage lines and the monster dies when the 2nd damage line is applied, you will only get one additional confusion (not 2 or 3).
the spell, you can deduce that only one cell can match the Count's real position.
Vulnerability
Now let's look at vulnerability, as Count Harebourg is invulnerable by default. Making him vulnerable is only possible on even turns, thanks to the permanent "Gousset" effect. To do this, you must attack Count Harebourg during an even turn so that he is teleported onto an allied character or a monster. The Count then becomes vulnerable for 1 turn.
Note that:
- Count Harebourg and the character "used" to make him vulnerable will swap positions.
- With each teleportation, Count Harebourg AND the character "used" gain a 100 damage bonus for 1 turn, stackable 2 times.
- If you use a monster to make Count Harebourg vulnerable, the monster will also gain a 100 damage bonus for 1 turn, stackable 2 times.
- !!! Warning !!! It is possible to use a summon to make Count Harebourg vulnerable. However, all allies within 4 range or less of the summon's arrival cell (Count Harebourg's initial cell) will be killed.
How the fight plays out
How the fight plays out will depend a lot on your team composition. The fight can be done easily and quickly with the Iop / Masqueraider / Pandawa combo, which lets you kill Count Harebourg on turn 4 before finishing off the rest at your leisure.
If you don't have a team of this type, you will still need a minimum of protection (healing or shield) to clear the monsters in the following order: Cycloid, Nocturnowl, Bubotron, before finishing with the Count.
An excellent knowledge of the confusions (consider printing the table above) as well as of how the monsters work is obviously necessary to overcome Count Harebourg.
Achievements
Versatile
The simplest achievement in theory; the only difficulty is keeping it in mind. The fight can be long, and it is easy to forget to perform the same action only once per turn. Completed with a team of Iop, Pandawa, Eniripsa, Masqueraider, Enutrof and Sadida.
Statue
For this achievement, you'll need a team with high damage potential: Iop, Masqueraider, Pandawa and the last class of your choice. The layout with the Count at the bottom right and the Cycloid at the top right is preferable. First turn: boost and Wasta on the Cycloid. Second turn: kill the Count using Masquerade. Third turn: kill the Cycloid. If it doesn't kill you on turn 4, you've won.
Duo
It's hard to give general advice for the Duo achievement, as the fight depends so much on the two classes used. There are generally 3 different lines of attack:
- Iop/Masqueraider or Iop/Pandawa duo: rely on the Iop's striking power to finish the fight as fast as possible, with the other class protecting him (Pandawa carrying, Masqueraider putting up shields).
- Trap-network Earth Sram/Fire class duo: the Sram must have at least 187 Lock so that the double keeps the Count busy. Both characters clear the monsters while invisible, then the Sram sets up a trap network to kill Count Harebourg in one turn.
- Air Sram/Fire class duo: the Sram must have at least 187 Lock so that the double keeps the Count busy. Both characters clear the monsters while invisible, then kill the Count little by little, alternating between a double and invisibility.
Completed with an Air Sram and Fire Sadida team.
End of the dungeon
Talk to Count Harebourg to leave the dungeon.