"Katamashii's Lair" Heat up some water and relax!
Monsters
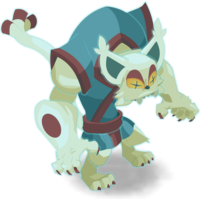
Kaeneko
Lvl 201 to 209
Spells
| Name | Description | Range |
|---|---|---|
| Surprise Party Surprise partie | Teleports to an ally or an enemy. If the target is a monster, the number of allowed recasts during the turn increases by 1. | — |
| Tao Penpen | Deals Earth lifesteal and reduces the target's Lock and Dodge. | — |
| Suffocating Proximity Proximité étouffante | Pulls targets located in a 3-cell line. If the Kaeneko breaks free from a lock, it gains 2 AP and 300 damage. | — · ligne |

Madura
Lvl 201 to 209
Spells
| Name | Description | Range |
|---|---|---|
| Zudzuki Bozu | Moves 5 cells closer, deals Fire damage, then pushes the target back 5 cells. The Madura gains 2 MP if the target takes pushback damage. | — |
| Jishin Desu Jishin desu | Deals Earth damage in an area. The damage increases with each cast until the end of the fight, up to a maximum of 11 increases. | — · zone |

Onirakam
Lvl 203 to 211
Spells
| Name | Description | Range |
|---|---|---|
| Temeitasos Sostomat | Grants 2 MP and 200 pushback damage to the Onirakam. | — |
| Ataibarra | Removes MP and deals two lines of Fire damage; the second increases based on the Onirakam's missing HP. | — · ligne |
| Soulsplitter Scinde-âme | Deals Air damage in an area and pushes targets back 6 cells. | — · zone |
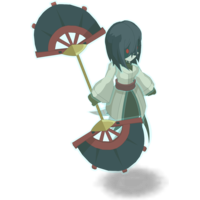
Yukisamara
Lvl 204 to 212
Spells
| Name | Description | Range |
|---|---|---|
| Haloe Vera Halo Evera | Heals allies within a 2-cell circle around the Yukisamara when she takes Earth damage. | — · cercle |
| Han’en | Deals Neutral damage and applies 15% erosion in a half-circle area. The spell can be cast twice per turn. | — · demi-cercle |
| Yubiwa | Deals Air damage in a full circle and steals Chance from targets. | — · cercle |
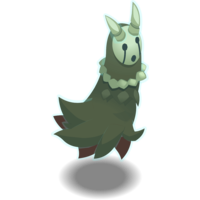
Kaonashi
Lvl 200 to 208
Spells
| Name | Description | Range |
|---|---|---|
| Choomiryoo | Deals Neutral damage and increases the Kaonashi's critical hit chance by 10% per target hit. | — |
| Wairo | Heals an enemy target for a percentage of its HP, but increases the damage it takes by 25% for 2 turns. | — |
| Noroi | Deals Water damage. On a critical hit, the Kaonashi becomes invisible. | — |
Rooms
Room 1
Room 2
Room 3
Boss

Katamashii ★
Lvl 220
Spells
| Name | Description | Range |
|---|---|---|
| Burning Barb Pique brûlante | Deals two lines of damage; the second increases based on Katamashii's missing HP. | — · ligne |
| Barbecue Among Friends Barbecue entre copines | Deals Water damage as lifesteal and applies a 50 Dodge penalty. | — |
| Piggish Gossip Potin comme cochon | Teleports Katamashii onto a flame and grants her 1,100 shield points. | — |
| Messe basse | Grants Power to Katamashii when she takes pushback damage. The bonus is also applied to allies within 1 cell of her. | — · cercle |
Dungeon mechanics
Monster overview
The dungeon features the following monsters:
- One monster from the Material plane
- Two monsters from the Astral plane
- The boss
Monster transformation
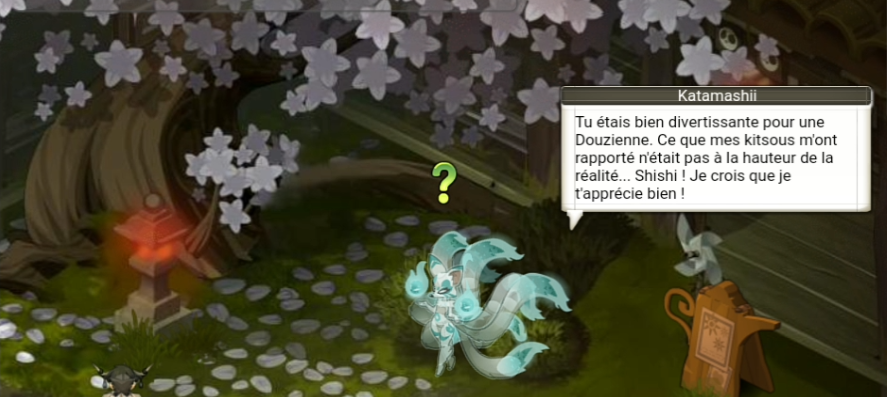
When they die, the monsters turn into flames. They won't do anything, but they can be used to debuff the boss
Monster states
All monsters are invulnerable by default and must be debuffed to become vulnerable. They can be affected by two states:
- Resonance: the state required to debuff a monster and make it vulnerable.
- Dissonance: a state that prevents a monster from being debuffed for one turn.
Conditions for the states.
When a monster is moved, it applies an effect in a line and diagonally from its arrival cell, depending on its plane (Material/Astral)
For example:
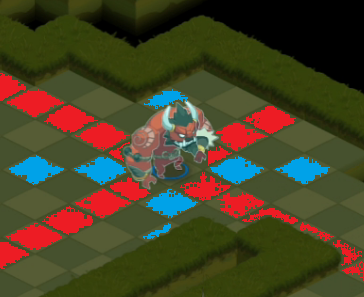
Onirakam can put Kaeneko in the Resonance state if it is moved onto its diagonal.
The boss enables Resonance in both planes, but only in lines.
Debuffing the Boss
To debuff the boss, it must go through the Resonance state of each monster (or flame if the monster has been killed) without accidentally entering the Dissonance state.
If you have already killed the other monsters:
You must place the two red flames on the boss's diagonals and the blue flame in its line during the same game turn. (It becomes invulnerable again on the turn of the character who placed the last flame!)
In summary:
- the Kaeneko can debuff the Kaonashi and Onirakam, in a line
- Kaonashi and Onirakam can debuff the Kaeneko, diagonally
- the boss Katamashii can debuff Kaeneko, Kaonashi and Onirakam in a line
- you need the combination of Kaeneko, Kaonashi and Onirakam to debuff the boss
Strategy tips
- Be careful when moving a monster not to trigger a state by mistake.
- Use the boss's ability to resonate in both planes to make debuffing easier.
- The Kaeneko teleports during its turn, which multiplies the chances of putting the other monsters in Resonance/Dissonance.
- If you kill a monster, the boss Katamashii will summon a soul (in the form of a flame) that takes its place but cannot deal damage to you. However, the boss Katamashii can swap places with it, which makes positioning more unpredictable.
Strategy
You can clear the monsters before taking on the boss to improve survivability.
To do this, kill Onirakam first, as it is the easiest to debuff.
Kaeneko will be very annoying throughout the fight but remains an essential tool for debuffing the other monsters. Don't hesitate to simply use the boss Katamashii to debuff the monsters in a line in order to clear them.
As is often the case, Pandawa and Sacrier disciples will feel right at home in this dungeon. Sram and Rogue are also very effective.
It is possible to do the dungeon by killing the boss first; removing its invulnerability will be easier, but the fight gets more complicated because you will take more damage.
Achievements
Clean Hands
The "Clean Hands" achievement is the easiest of the three. To complete it very easily, make sure you have at least two classes that apply indirect damage to targets (Sram's poison or traps, Feca's glyph, Rogue's bomb wall, etc.). This way you can easily finish off each monster indirectly and secure this achievement. :)
It is easier to complete this achievement on its own than together with the IMPERTINENCE achievement, but doing both at once is entirely possible.
Impertinence
The Impertinence achievement is quite special; it is much easier to complete when doing the dungeon with 3 players! I recommend finding the best starting position for the mobs before attempting this achievement (the Kaonashi placed at the top left, for example).
To make things easier, the class that takes the initiative should be able to pull a monster from turn 1 so that all the allies present can stick to it (preferably the Kaonashi!). Once the achievement is off to a good start, you can either keep the mob in melee with you (preferably the Kaonashi) and kill the others quickly, or kill the mob in your melee range directly (by constantly placing the boss in its line, for example) and use the first flame to keep Impertinence going.
Once all the monsters are dead, you just have to finish off the flames in melee to secure a solid Impertinence achievement.
Duo
The starting placement is very tricky; several attempts will likely be needed to get used to the mobs' capricious AI.
The big challenge of this fight is debuffing and killing the mobs in record time to give yourself as many turns as possible to spend on the boss. To do this, you absolutely must kill the Onirakam (Earth weakness) and the Kaeneko (Water weakness) as quickly as possible, pushing the boss onto their line as many times as possible to debuff them, or using another mob. That said, debuffing with the boss remains the easiest method, especially in DUO.
Once the mobs are dead, the hardest part is done. You can keep the Kaonashi around to heal yourself while you take down the boss, but watch out for the increased-damage penalty.
Whether for the monsters or the flames, always check the buff bar before making a move. The "❔" symbol in the buff bar tells you which state is applied.
Important information: Since the removal of the invulnerable state lasts a full turn, ending with the entity that unlocked the boss, the ideal way to optimize every player's damage — and avoid the situation where one player unlocks while only one player hits — is to place 2 of the 3 monsters/flames with the players and make the last placement with a summon (roublabot, groute, boar, tactirelle, etc.); this lets you play both of your full damage turns on each unlock.
Note that roughly one time out of three, a state applies on its own when it teleports with a flame. If you can put the boss in the Gravity state, it won't be able to teleport with the flames, but it also won't be able to give itself the 1,100 shield it usually does! (Info to be verified)
With perseverance, you will manage to clear this dungeon in DUO easily, provided you have solid characters that hit hard enough!
Thanks to Lys-DT for the advice on completing the achievements; you can find the duo dungeon run on his channel.
End of the dungeon